Reduce Waste, Grow More: The Magic of Home Composting
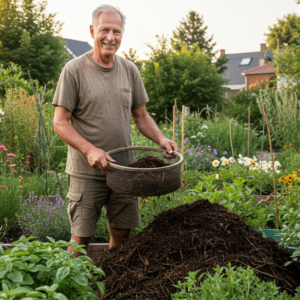
Table of Contents
Turn Trash to Treasure: Your Guide to Easy Home Composting
Imagine a world where your kitchen scraps and yard waste don't just end up in a landfill, but instead become a nutrient-rich superfood for your garden. Sounds like magic, right? Well, it's not magic – it's the wonderful world of home composting!
Composting at home is a simple, sustainable, and incredibly rewarding practice that benefits both your garden and the environment. Whether you're a seasoned gardener or just starting out, learning to compost is easier than you might think. Let's dig in!
Why Should You Compost at Home? The Benefits are Blooming!
- Enrich Your Soil: Compost is packed with essential nutrients that improve soil structure, water retention, and aeration. This leads to healthier, more vibrant plants.
- Reduce Waste: A significant portion of household waste is organic material that can be composted, diverting it from landfills where it contributes to greenhouse gas emissions.
- Save Money: By making your own compost, you'll reduce the need to buy expensive fertilizers and soil amendments.
- Environmentally Friendly: Composting is a natural way to recycle organic matter, creating a closed-loop system in your garden.
- It's Easier Than You Think! With a few simple steps, you can start creating your own "black gold."
Getting Started: What You'll Need
You don't need a lot of fancy equipment to start composting. Here are the basics:
- A Compost Bin or Area: This can be as simple as a designated corner in your garden, a basic plastic bin with air holes, or a more elaborate tumbling composter. Choose what suits your space and budget.
- "Brown" Materials: These are carbon-rich materials that provide energy for the composting microbes. Think of them as the "structure" of your compost. Examples include:
- Dried leaves
- Straw
- Cardboard (torn into small pieces)
- Paper towels and napkins (uncoated)
- Wood chips
- "Green" Materials: These are nitrogen-rich materials that provide food for the microbes. They are the "fuel" of your compost. Examples include:
- Fruit and vegetable scraps
- Coffee grounds and tea bags (remove staples)
- Grass clippings (use sparingly and mix well)
- Spent flowers
- Water: Moisture is essential for the composting process.
- A Shovel or Pitchfork (Optional): For turning and mixing your compost.
The Recipe for Compost Success: Layering and Mixing

The key to successful composting is maintaining the right balance of "browns" and "greens," along with adequate moisture and aeration. Here's a general guideline:
- Start with a Layer of Browns: This helps with drainage and aeration at the bottom of your bin.
- Add a Layer of Greens: Spread them evenly over the browns.
- Continue Layering: Alternate between browns and greens, aiming for a ratio of roughly 2:1 or 3:1 browns to greens. Think of it like making a lasagna!
- Add Water: Your compost pile should be damp like a wrung-out sponge. Add water if it seems too dry.
- Mix Regularly (Optional but Recommended): Turning your compost pile every few weeks helps to aerate it, speed up decomposition, and prevent odors.
What to Compost (Yes Please!):
- Fruit and vegetable scraps (including peels, cores, and ends)
- Coffee grounds and paper filters
- Tea bags (remove staples and any plastic parts)
- Eggshells
- Dried leaves
- Grass clippings (use in moderation and mix well)
- Straw and hay
- Shredded newspaper and cardboard (plain, uncoated)
- Paper towels and napkins (uncoated)
- Spent flowers and dead houseplants
What NOT to Compost (No Thank You!):
- Meat, poultry, and fish scraps (can attract pests and cause odors)
- Dairy products (same as above)
- Oils and greasy foods (can attract pests and slow down decomposition)
- Cooked foods (can attract pests)
- Diseased plants (can spread diseases in your garden)
- Weeds that have gone to seed (can spread unwanted plants)
- Pet waste (can contain harmful pathogens)
- Coal or charcoal ash (can contain harmful substances)
- Glossy or coated paper
Troubleshooting Common Composting Issues:
- Smelly Compost: Usually caused by too much "green" material or not enough aeration. Add more "browns" and turn your pile.
- Dry Compost: Add water and mix.
- Slow Decomposition: Make sure you have a good balance of "browns" and "greens," adequate moisture, and are turning the pile occasionally. Smaller pieces of material will also decompose faster.
- Pests: Avoid composting meat, dairy, and oily foods. Ensure your bin has a lid or cover.
The Waiting Game: When is Your Compost Ready?
Patience is key! Depending on your climate, the materials you're using, and how often you turn your pile, it can take anywhere from a few months to a year for your compost to be ready.
Mature compost will be dark brown or black, crumbly, and have an earthy smell. You should no longer be able to recognize the original ingredients.
Using Your Homemade Compost: The Grand Finale!
Once your compost is ready, it's time to put it to work! Here are some ways to use your "black gold":
- Soil Amendment: Mix it into your garden beds before planting.
- Top Dressing: Sprinkle a layer around existing plants.
- Potting Mix: Combine it with other ingredients like topsoil and sand.
- Mulch: Use it to suppress weeds and retain moisture.
Start Your Composting Journey Today!
Home composting is a simple yet powerful way to connect with nature, reduce waste, and nurture your garden. So, gather your scraps, find a spot for your bin, and get started on your composting adventure. You'll be amazed at how easily you can turn everyday waste into a valuable resource for your green spaces!